HockeyResource.ca

Strategy

Team systems: breakouts, forechecks, power plays, D-zone coverage.

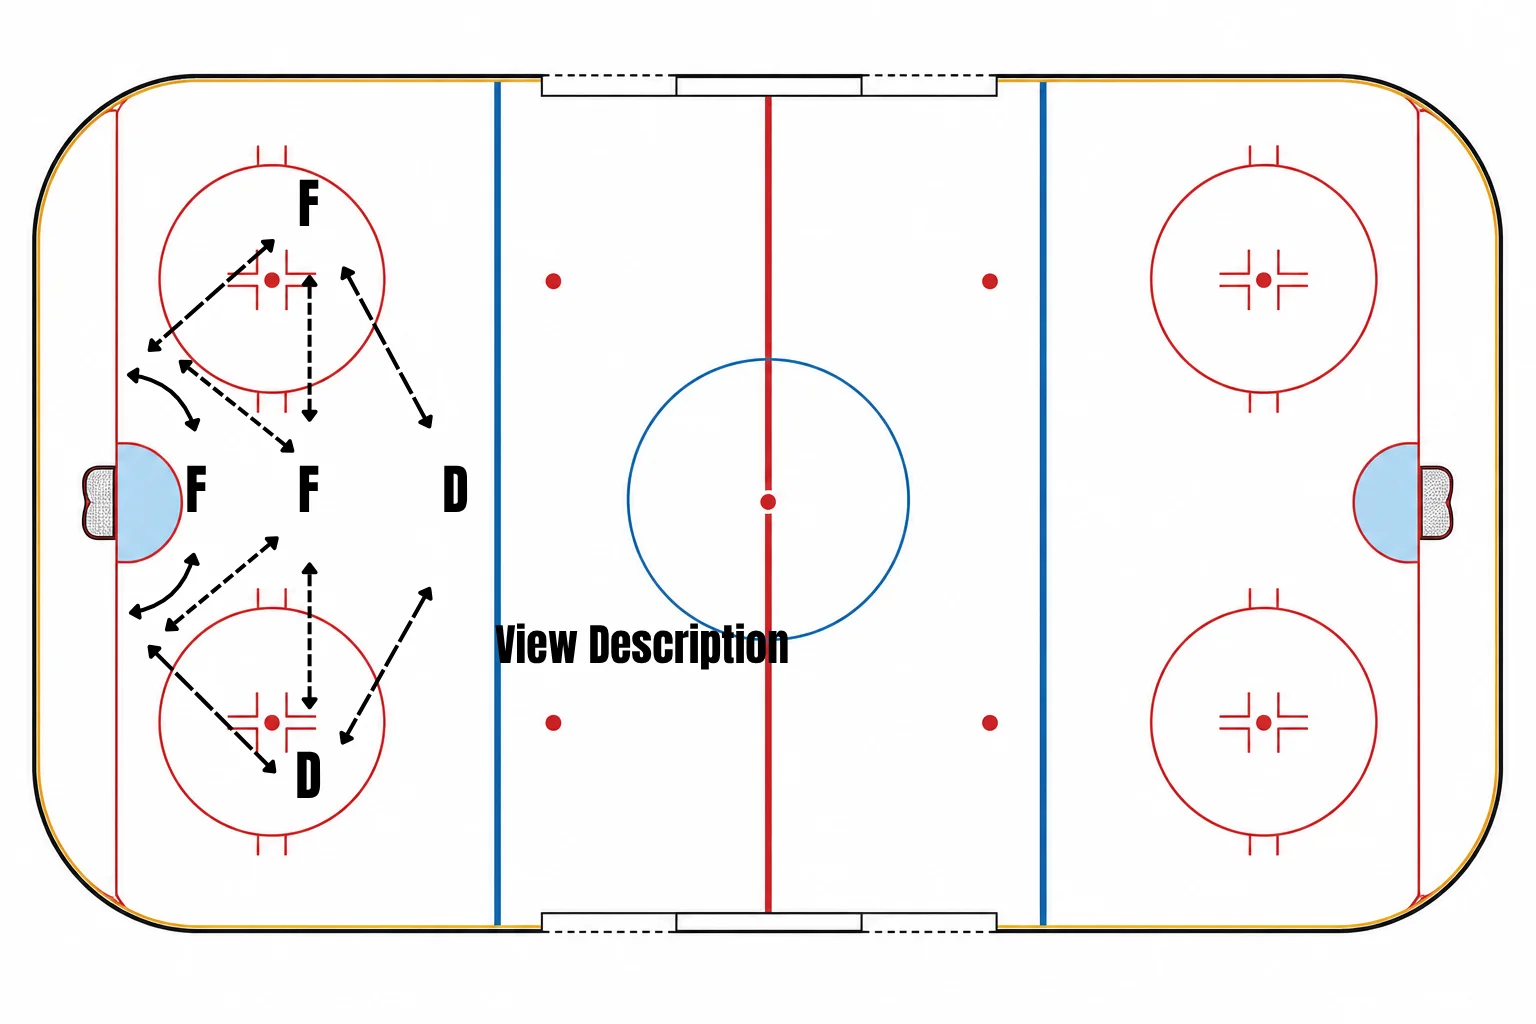
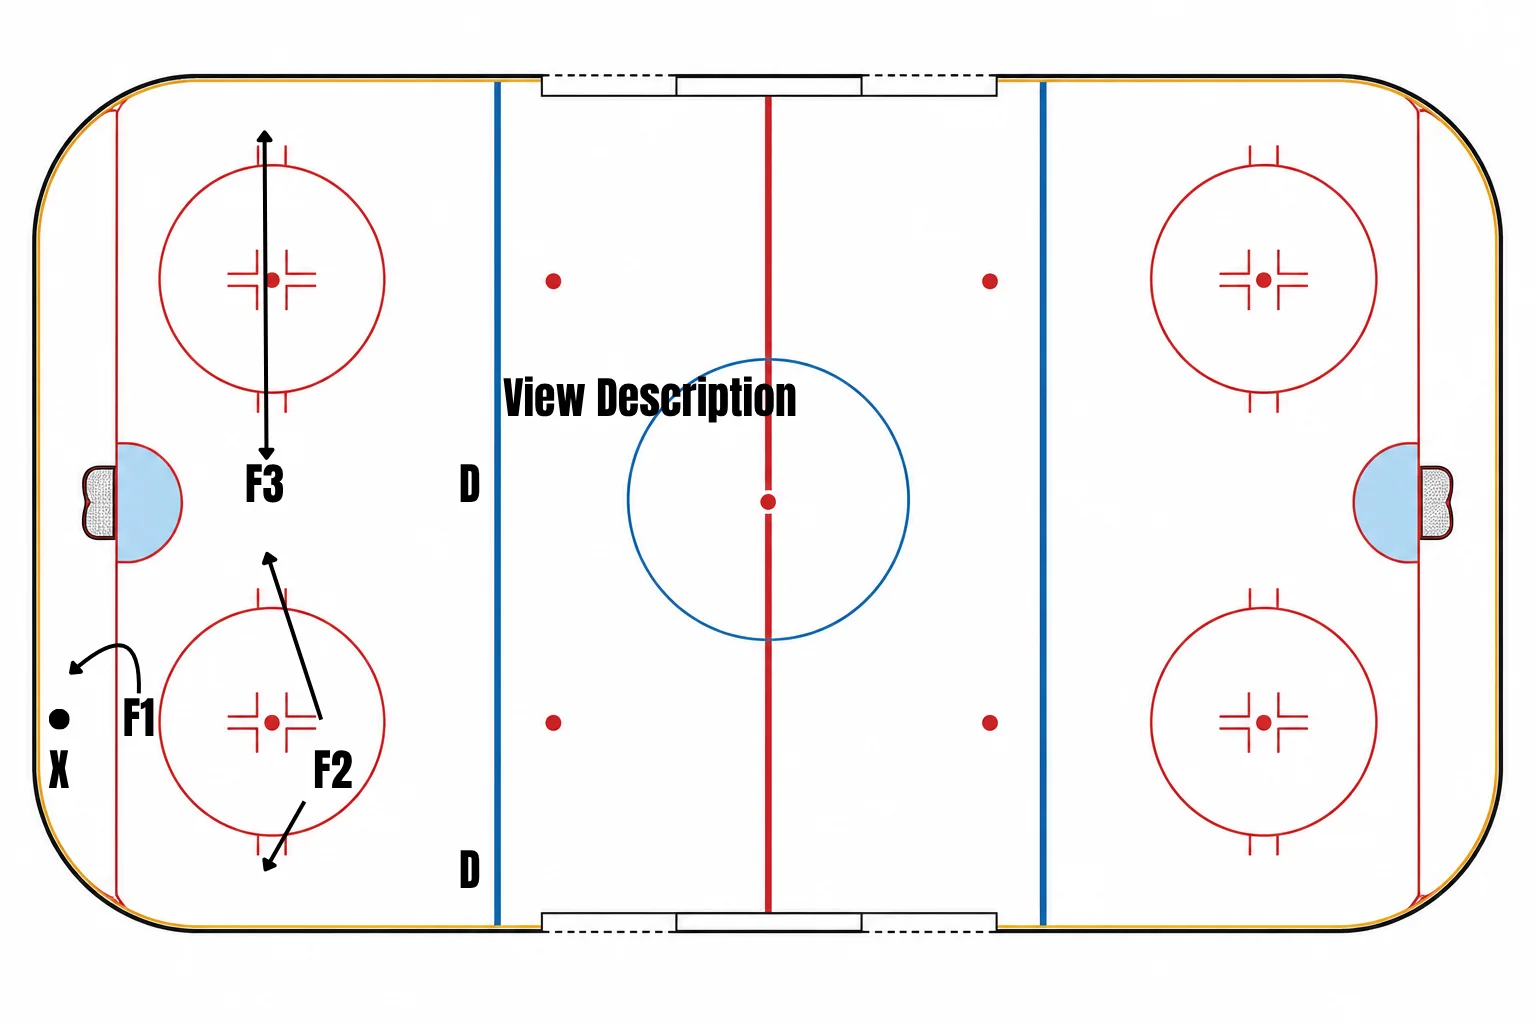
1-2-2 Forecheck

1-2-2 Forecheck

F1: First forward in - Pressures the puck and tries to force defender up the near wall F2: Second forward in - Goes to the near half-wall by the hash-marks to take away the lane F3: Third forward in - Goes to the slot and floats First D covers the High wall, second D plays middle. If puck is moved to the other side: F1 - Keeps pressuring the puck F3 - Moves fast over to the other half-wall to cover the lane F2 - Moves to middle where F3 was Second D-man moves over to other high wall and first D-man moves to middle. Very important that F1 is pressuring hard and F2 gets to the wall. F3 has to get to other half-wall as fast as they can if puck is moved.

U11+Forecheck
1-3-1 Powerplay

1-3-1 Powerplay

The D-man at the top is the QB and main puck distributor, everything runs through them. The middle forward (bumper) is the most dangerous player as they control the middle of the slot. The half-wall players are also puck distributors as well as shooters. The net front forward shifts depending on which side the puck is on. Puck movement is necessary to open up shooting opportunities. For example, the half-wall player moving the puck down to the net front player may open up a pass to the bumper for a high-percentage shot. If that lane isn't open, puck can be moved back up to half-wall player. Half-wall player moves puck to QB, bumper, net-front forward, or can take a shot. Puck must be moved back up to QB when resetting, to try and open up more lanes or to slow things down. In the diagram, you can see triangles being made with the passing options for each player. The triangles all open up space to create scoring opportunities or for a skip pass to the other half-wall player when a large opening is created.

U13+Powerplay
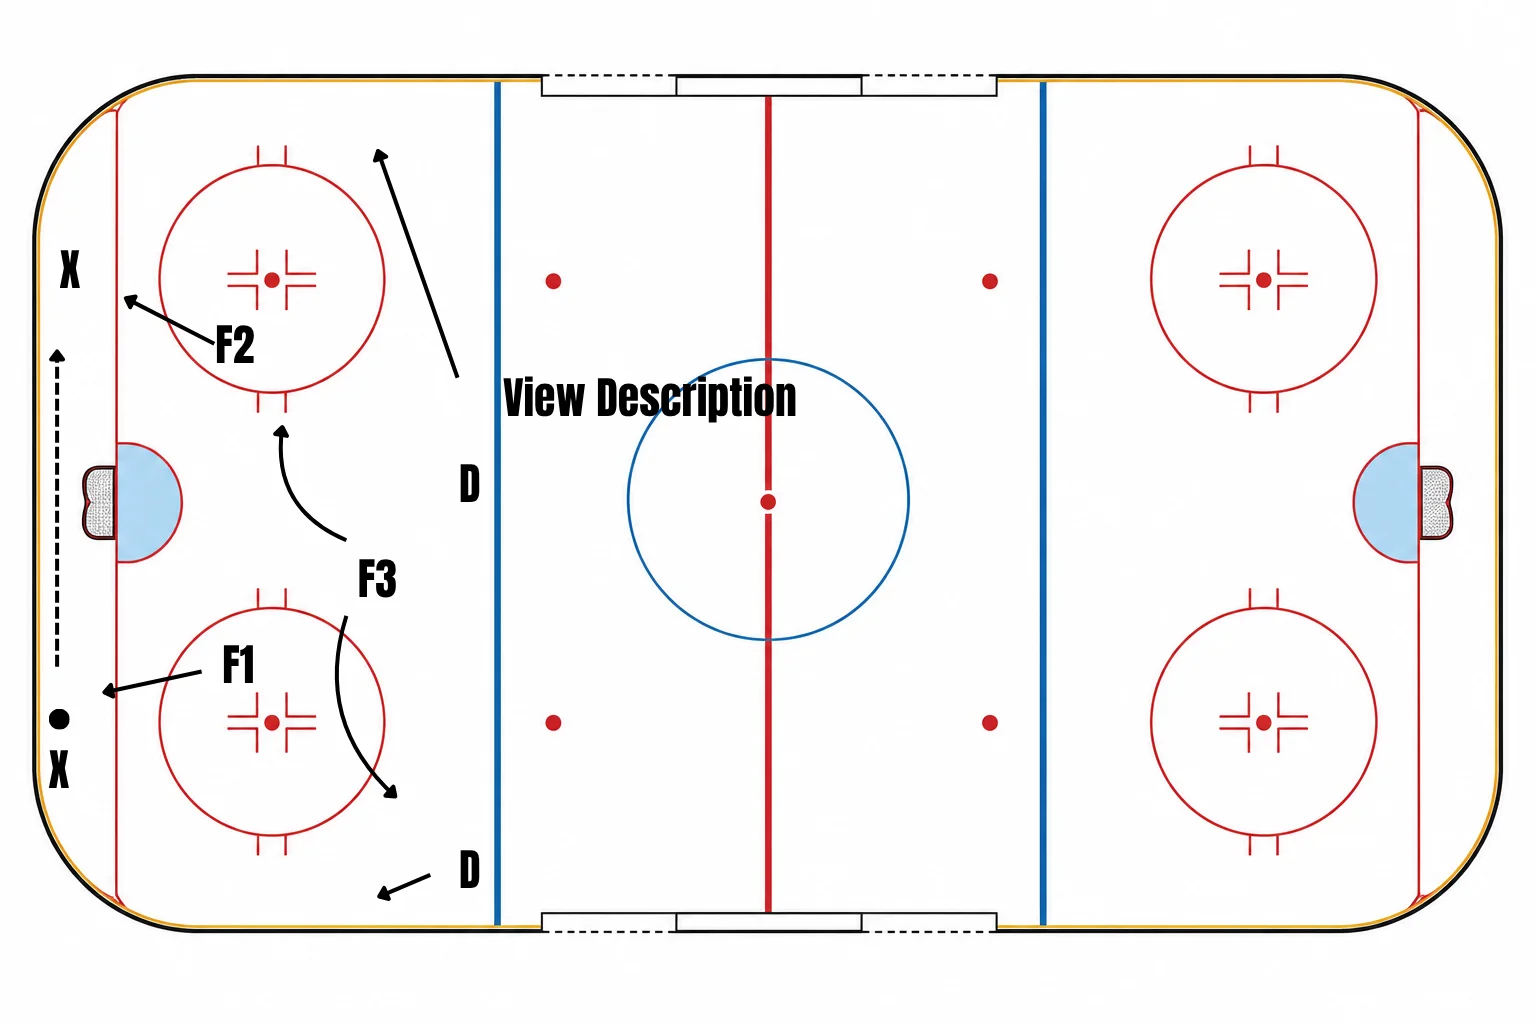
2-1-2 Forecheck

2-1-2 Forecheck

F1 - Pressures puck trying to get D to move puck behind net F2 - Pressures other D-man to trap them if they get puck F3 - Floats in slot reading the play Close D-man locks down the wall, weak-side D-man plays middle reading play and hinges back in case puck gets out of zone If puck gets moved behind the net, F1 gives back pressure, F2 pressures the puck, F3 leans towards strong side. Middle D-man moves towards wall, if puck opens up they will pinch, weak-side D-man moves to middle. If puck gets moved up the near wall, F3 pressures puck, F1 gives low support, F2 creeps towards slot. Strong side D-man holds wall unless pinching opportunity becomes available, weak-side D-man hinges back in case puck gets out of zone

U13+Forecheck
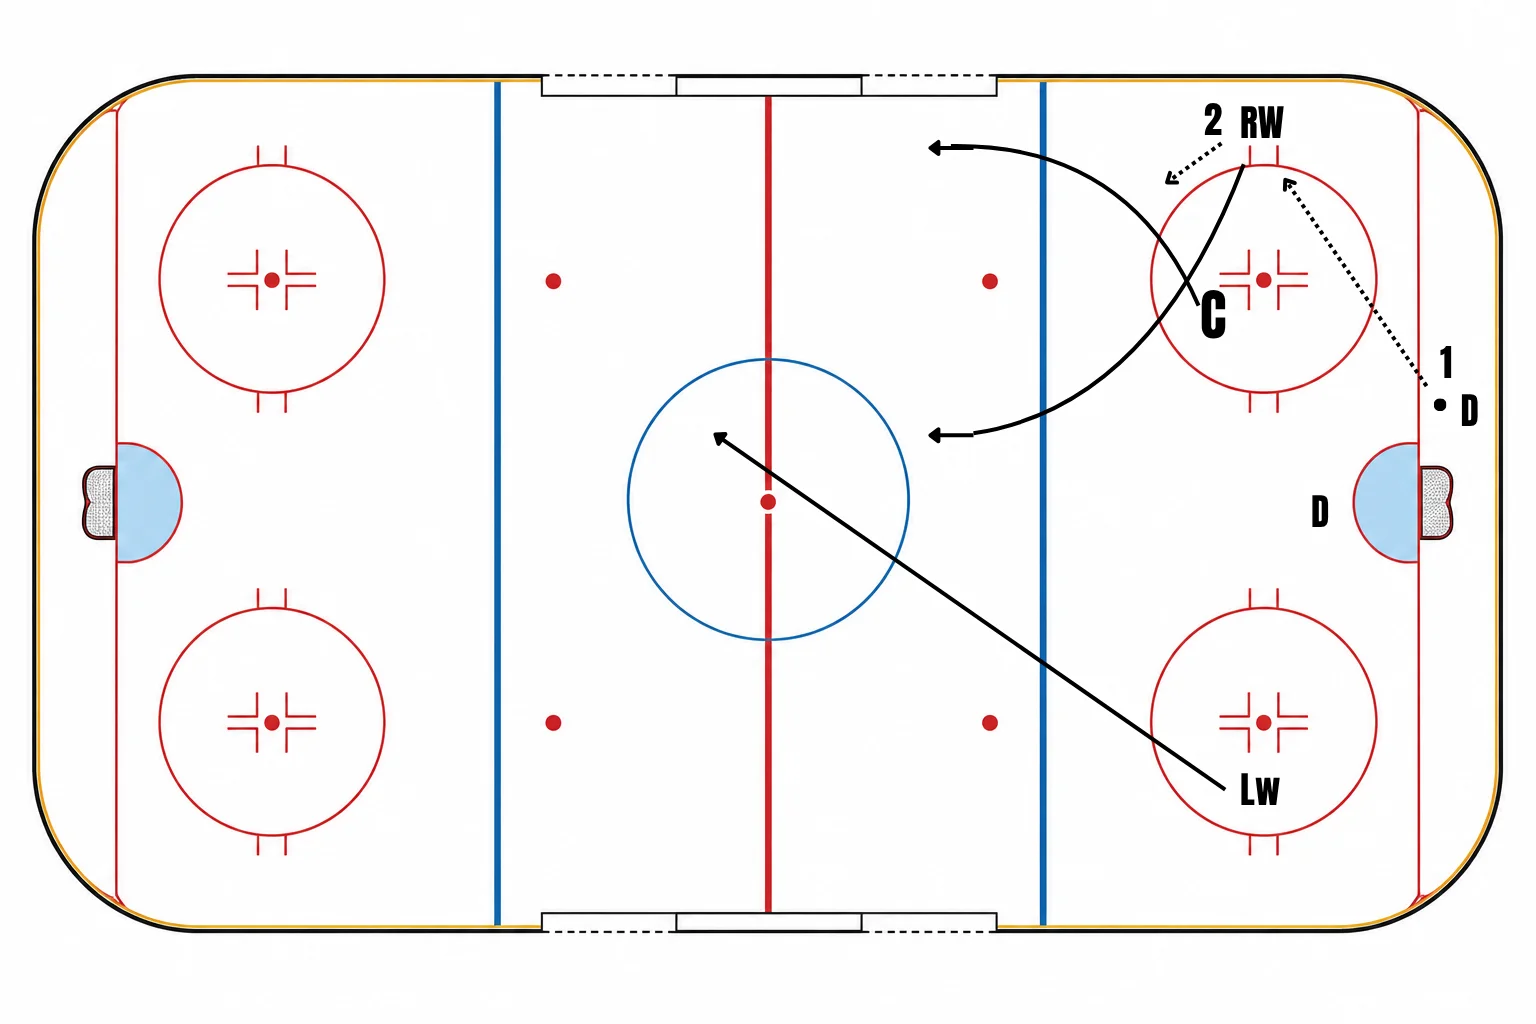
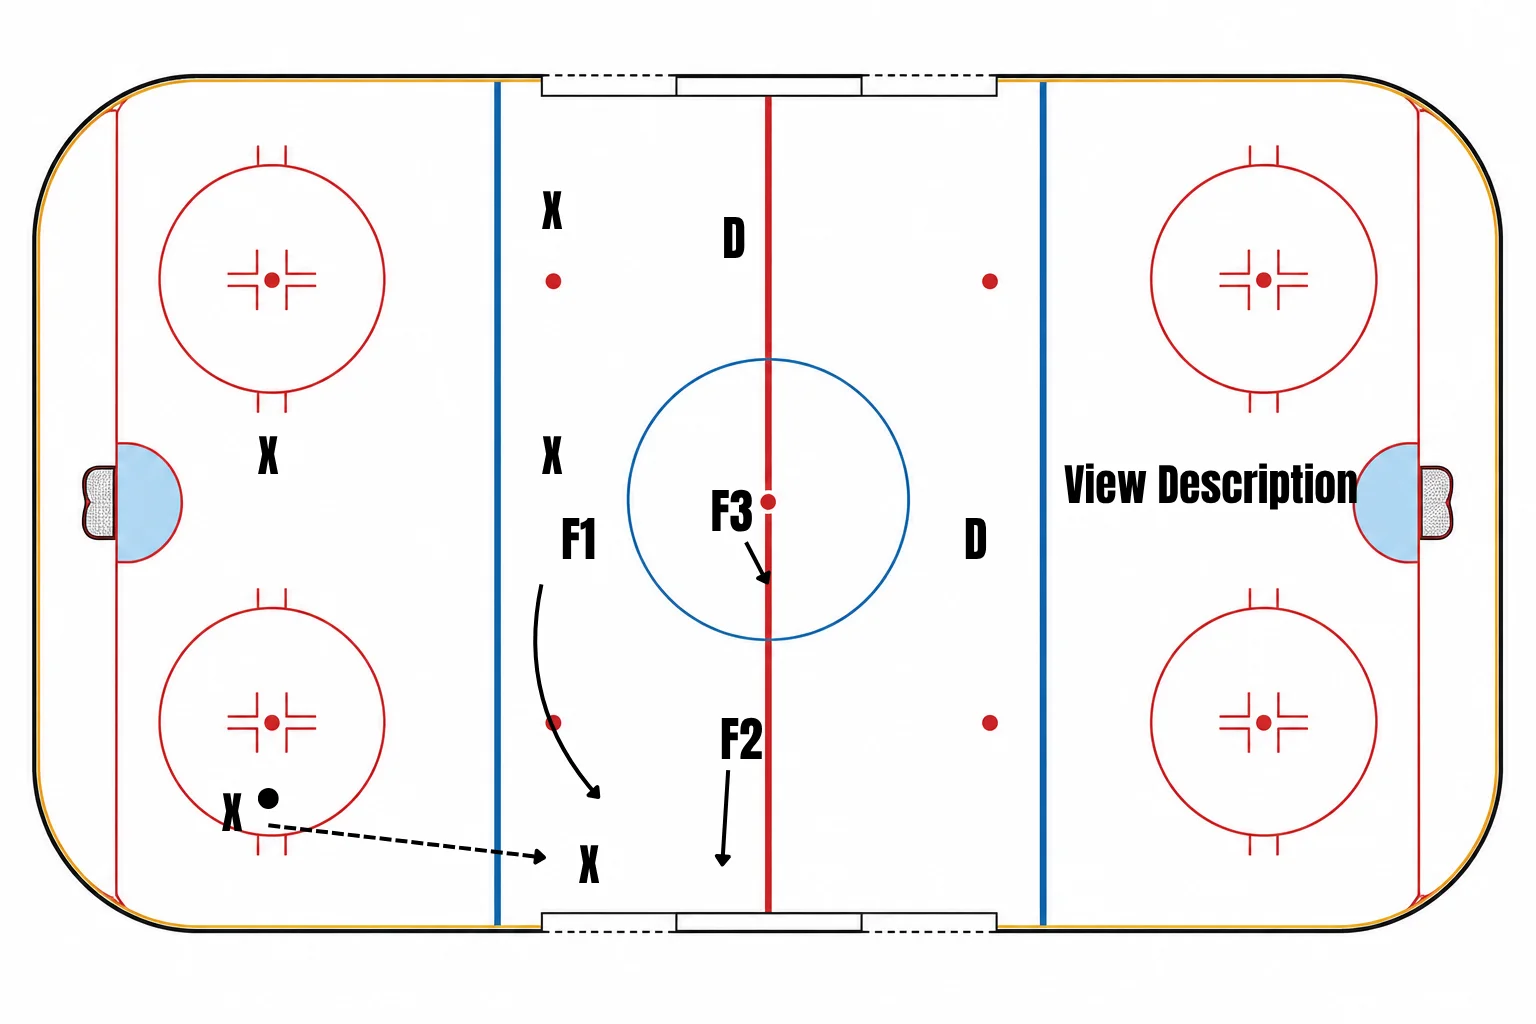
Basic Breakout

Basic Breakout

1) D-man picks up puck behind net and moves puck to winger who is on the boards by the hash marks. (Other D-man goes to front of net) 2) Centre (F1) skates up and receives pass from winger. Centre then drives wide. 3) Weak-side winger slashes through the middle (F2) 4) Winger who received pass trails behind as a third option (F3) Can drill this by having players lineup at centre ice and coach dumps puck in. D-man picks up puck behind net, other D-man goes in front of net, forwards proceed as drawn up.

BeginnerU9+Breakout
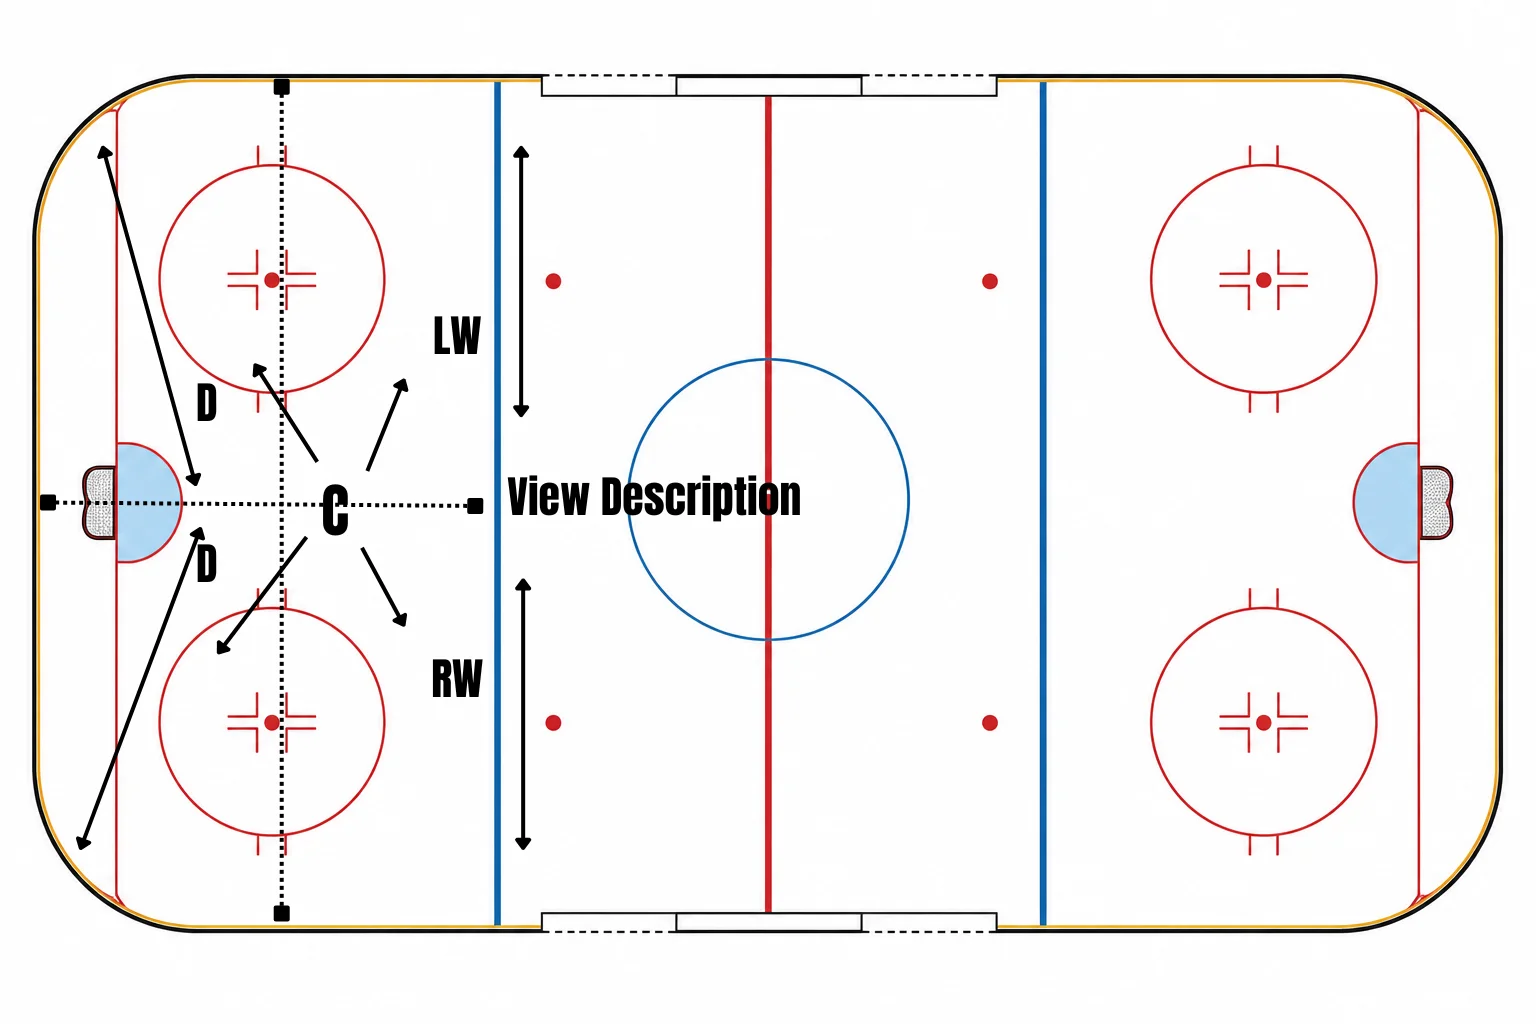
Box + 1 - Defensive Zone Coverage

Box + 1 - Defensive Zone Coverage

As seen in the diagram there are 4 quadrants. LW - Covers the point. when puck is on left side of the ice, LW shifts over closer to the left boards. When puck is on the right side, LW shifts towards the middle. RW - Covers the point. when puck is on left side of the ice, RW shifts over closer to the right boards. When puck is on the left side, RW shifts towards the middle. Centre - Centre is always supporting where the puck is. If puck is on top left, Centre supports, same thing for all 4 quadrants. Bias towards middle of ice so not to over commit. LD - Covers bottom left quadrant. When puck is on left side, LD shifts left. When puck is on right side, LD is in front of net. RD - Covers bottom right quadrant. When puck is on right side, RD shifts right. When puck is on left side, RD is in front of net. Important for D-man: if following behind net, switching with other D-man is okay. For instance, If LD follows behind net to right side, RD stays in front of net and becomes LD and covers left side until another switch.

U11+Defensive Zone
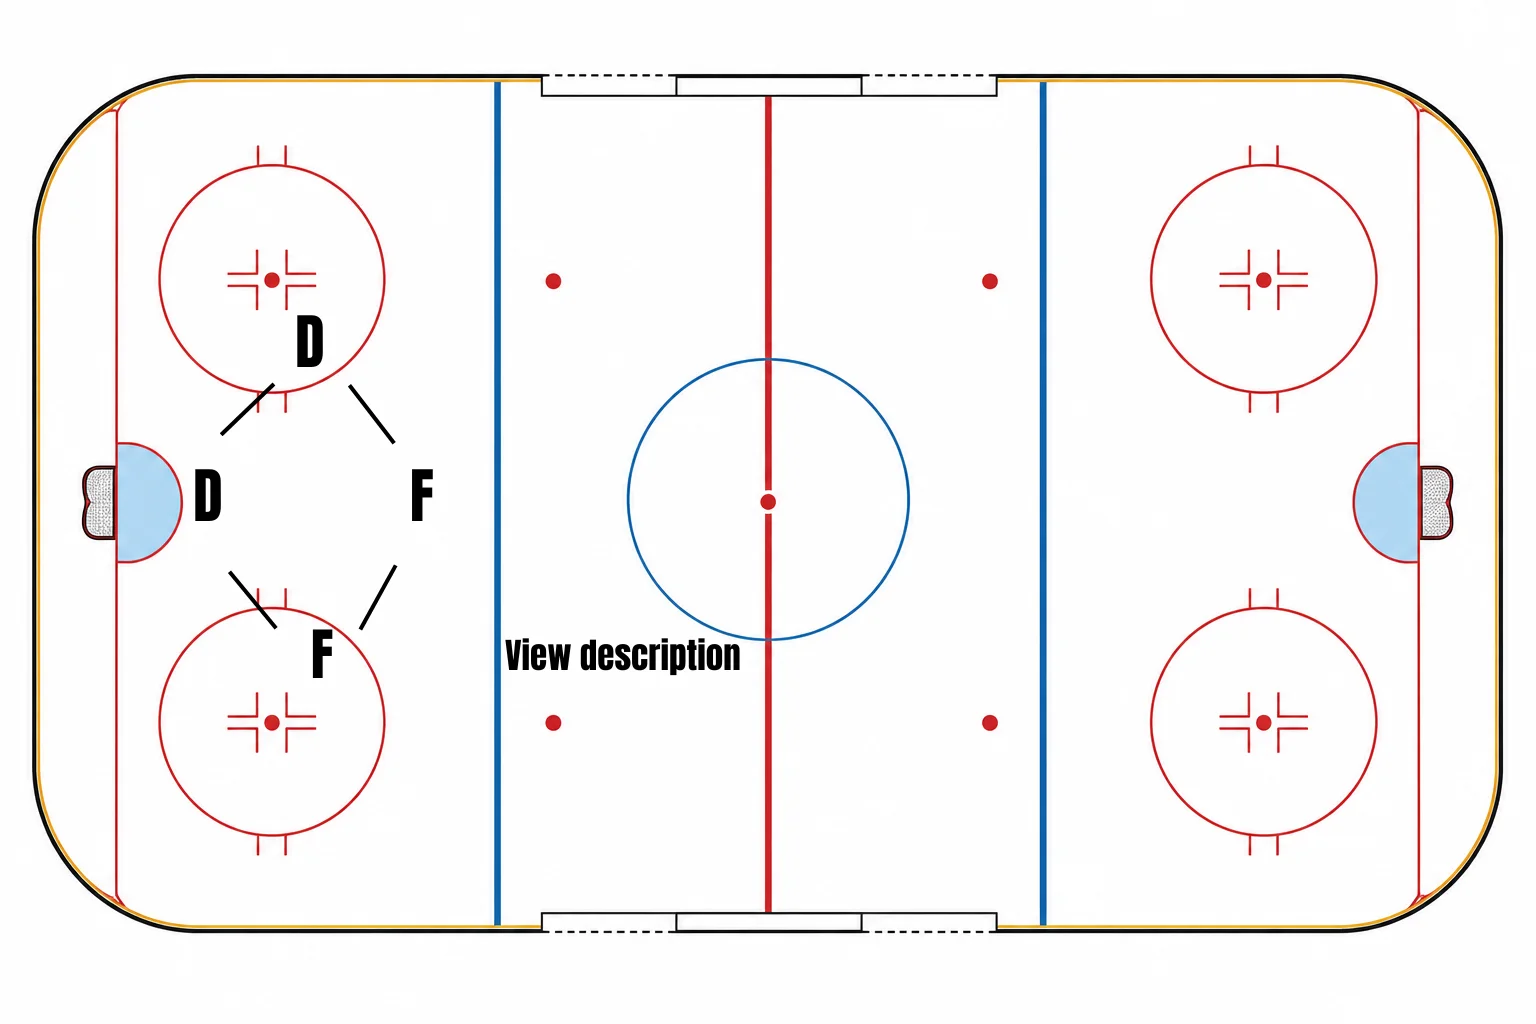
Box Penalty Kill

Box Penalty Kill

1) Players set up in a box formation 2) Not an aggressive setup and don't chase 3) Close defender can attack puck if it comes loose but avoid chasing when other team has possession 4) Sticks stay in passing lanes, not on the puck. Force perimeter shots 5) Box shifts as a unit toward the puck side, staying square 6) Net-front players box out and clear rebounds 7) Back two don't over commit behind the net 8) Only collapse/pressure when puck goes below the goal line or to a low half-wall with no easy pass out

U11+Penalty Kill
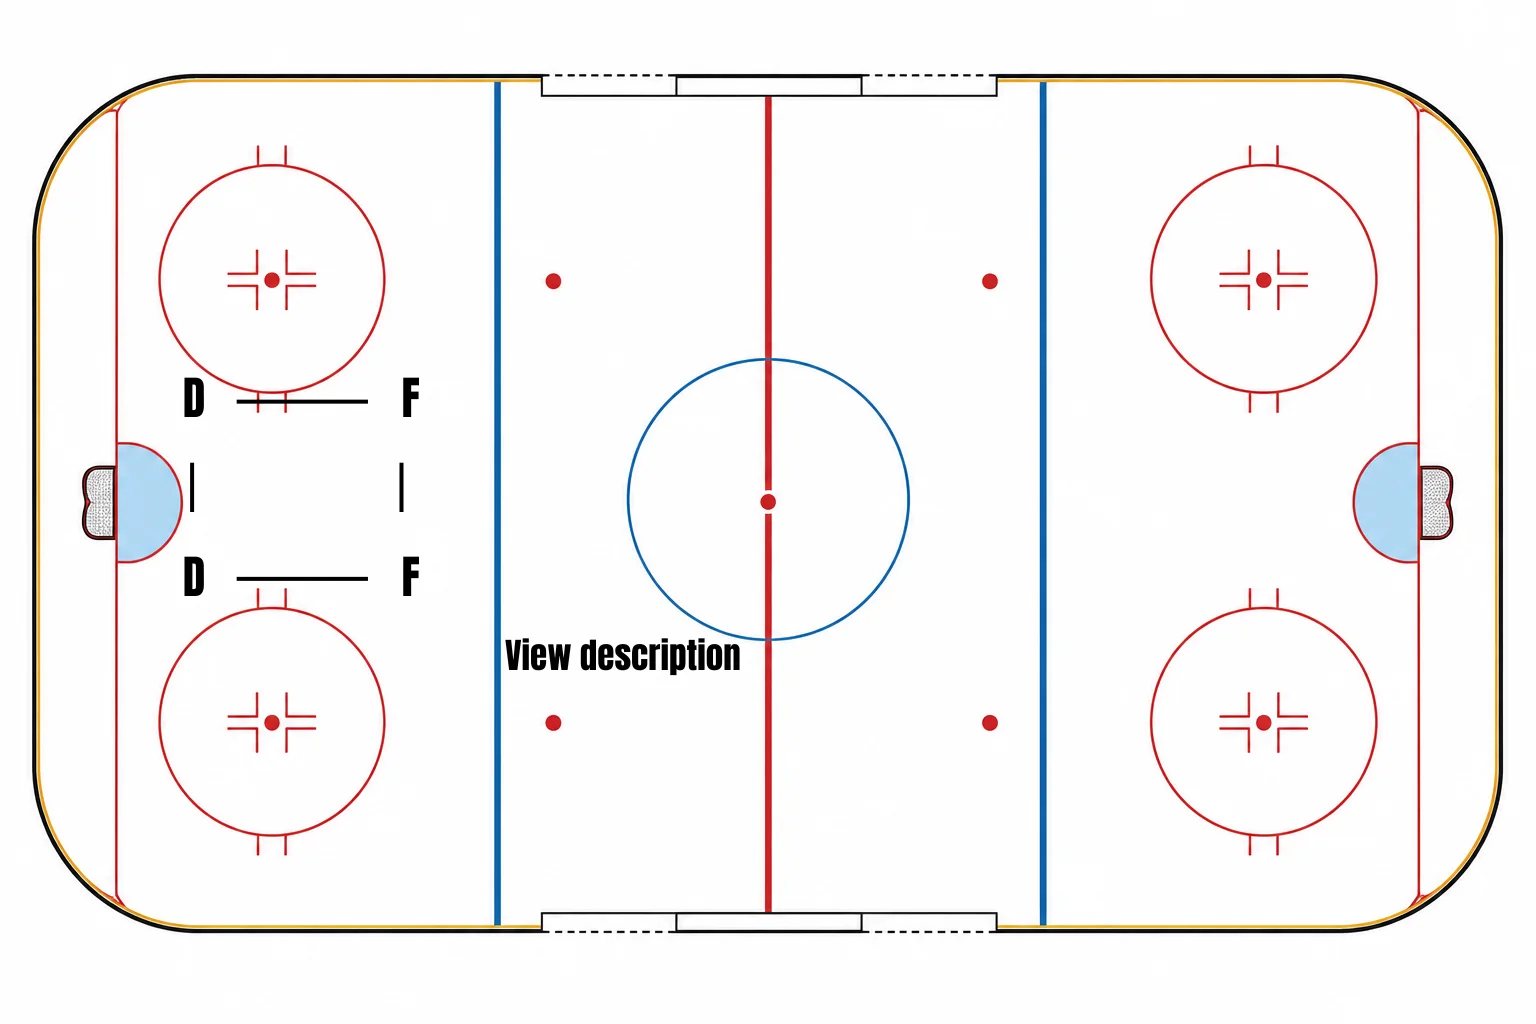
Diamond Penalty Kill

Diamond Penalty Kill

1) One forward up top, two players on the sides, one defence-man low in front of the net. Diamond shape 2) Top forward pressures the point, takes away the shot/one-timer option 3) Middle two take away cross-ice passing lanes and half-wall options 4) Low player protects the dangerous scoring area right in front of the net 5) Diamond shifts and tilts as a unit depending on which side the puck is on 6) Top forward's stick/body angles to force puck to one side, not straight pressure 7) Weak-side mid player watches for backdoor/cross-seam plays and shifts towards middle Good against teams that play a 1-3-1 PP.

U13+Penalty Kill