Strategy
Box + 1 - Defensive Zone Coverage
Description
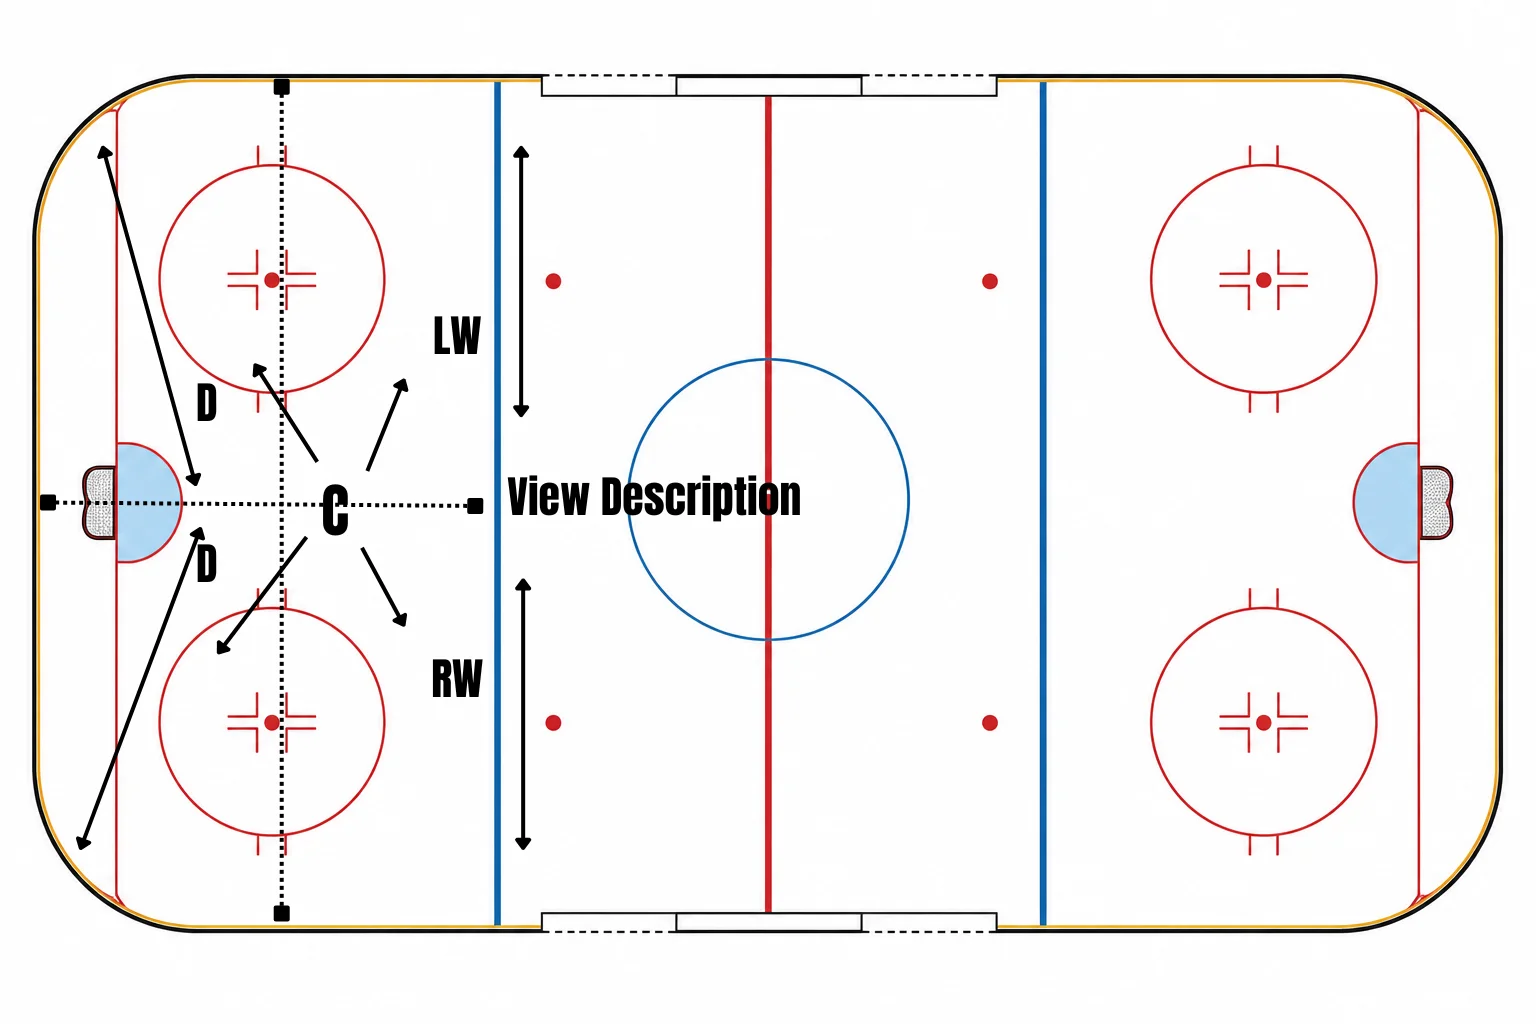
As seen in the diagram there are 4 quadrants. LW - Covers the point. when puck is on left side of the ice, LW shifts over closer to the left boards. When puck is on the right side, LW shifts towards the middle. RW - Covers the point. when puck is on left side of the ice, RW shifts over closer to the right boards. When puck is on the left side, RW shifts towards the middle. Centre - Centre is always supporting where the puck is. If puck is on top left, Centre supports, same thing for all 4 quadrants. Bias towards middle of ice so not to over commit. LD - Covers bottom left quadrant. When puck is on left side, LD shifts left. When puck is on right side, LD is in front of net. RD - Covers bottom right quadrant. When puck is on right side, RD shifts right. When puck is on left side, RD is in front of net. Important for D-man: if following behind net, switching with other D-man is okay. For instance, If LD follows behind net to right side, RD stays in front of net and becomes LD and covers left side until another switch.